
Why do some objects float while others sink?
A simple container of water and a collection of everyday objects can become an exciting early science experiment.
Sink-or-float activities encourage children to make predictions, test their ideas, observe what happens and compare results.
These activities are suitable for children around 3–7 years old and can be used at home, preschool, childcare or kindergarten.
What Does Sink or Float Mean?
An object floats when it stays on or near the surface of the water.
An object sinks when it moves down through the water and rests at the bottom.
Children may initially think:
“Heavy things sink and light things float.”
But experiments can help them discover that it isn’t always that simple.
The material, shape, trapped air and overall density of an object can all affect whether it sinks or floats.
What You’ll Need
Depending on the activity, you can use:
- Large bowl or water tub
- Water
- Plastic toys
- Corks
- Bottle caps
- Stones
- Sticks
- Leaves
- Fruit
- Aluminium foil
- Playdough
- Coins
- Spoons
- Small containers
- Paper and pencil
Always supervise children closely around water.
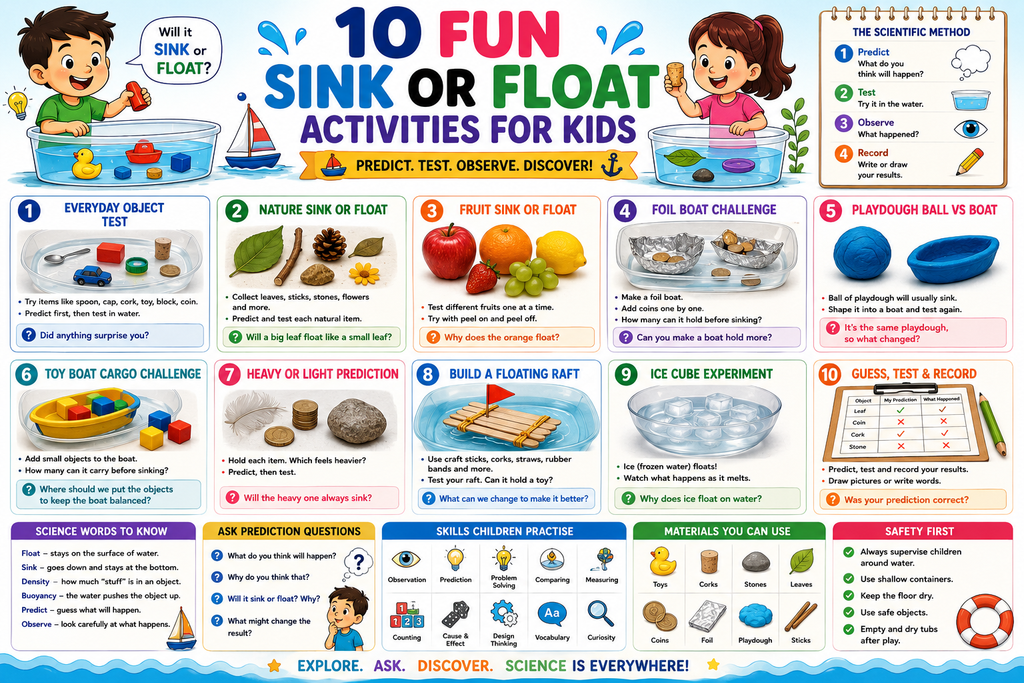
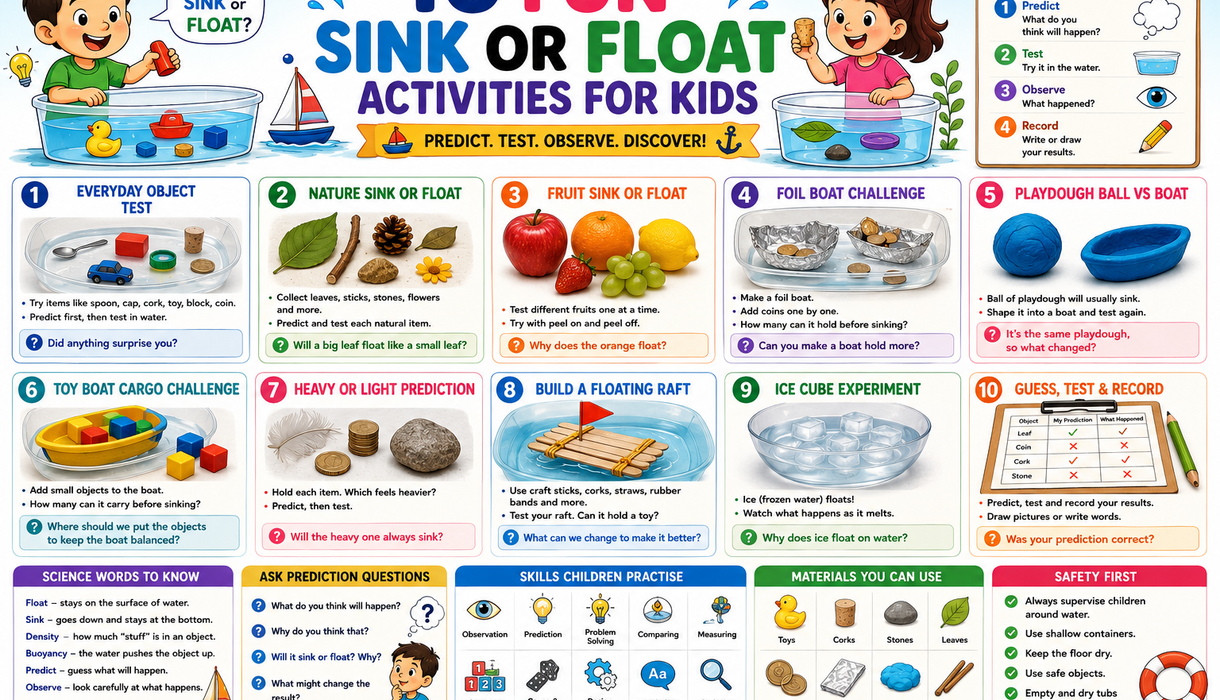
1. Everyday Object Sink or Float Test
Start with a simple collection of household objects.
Try:
- Spoon
- Bottle cap
- Toy car
- Cork
- Block
- Coin
- Plastic lid
Before testing each item, ask:
“Do you think it will sink or float?”
Let the child place it into the water.
Create two groups:
SINK
and
FLOAT
Ask:
“Did anything surprise you?”
2. Nature Sink or Float
Collect safe natural materials such as:
- Leaves
- Sticks
- Stones
- Seed pods
- Flowers
- Bark
Test each one in water.
Ask children to predict first.
You can compare similar objects too.
For example:
Will a large leaf behave the same as a small leaf?
Will every stone sink?
This combines outdoor exploration with science.
3. Fruit Sink or Float
Choose several fruits.
Try:
- Apple
- Orange
- Grape
- Lemon
- Strawberry
Place them into water one at a time.
Ask:
“Which fruit do you think will float?”
An orange can be particularly interesting because its peel contains tiny air spaces that can help it float.
For an extra experiment, compare an orange with its peel and a peeled orange.
4. Foil Boat Challenge
Give children a square of aluminium foil.
Ask them to shape it into a boat.
Place the boat on the water.
Then add small coins or counters one at a time.
Count:
1, 2, 3, 4…
How many can the boat hold before it sinks?
Try reshaping the foil and testing again.
Ask:
“Can you make a boat that holds more?”
This introduces simple engineering and design thinking.
5. Playdough Ball vs Playdough Boat
Give children a ball of playdough.
Drop it into the water.
It will usually sink.
Now take the same playdough and shape it into a wide bowl or boat.
Test it again.
Depending on the material and design, children may be able to create a shape that floats.
Ask:
“It is the same playdough, so what changed?”
This helps children discover that shape matters.
6. Toy Boat Cargo Challenge
Place a toy boat or small floating container in water.
Add small objects one at a time.
Try:
- Buttons
- Blocks
- Stones
- Counters
Count how many objects the boat carries before water begins entering or the boat sinks.
Ask:
“What happens when we add more weight?”
“Where should we put the objects to keep the boat balanced?”
7. Heavy or Light Prediction
Choose objects with noticeably different weights.
Before testing, let children hold each one.
Ask:
“Which feels heavier?”
“Do you think the heavy one will sink?”
Then test.
Children may discover that a large lightweight plastic object can float while a tiny metal coin sinks.
This helps challenge the idea that size alone decides the result.
8. Build a Floating Raft
Provide materials such as:
- Craft sticks
- Corks
- Straws
- Rubber bands
- String
Ask children to build a small raft.
Place it on the water.
Can it float?
Can it carry a toy?
If it sinks, encourage children to change the design and try again.
Ask:
“What could we change?”
This supports problem-solving and persistence.
9. Ice Cube Experiment
Place several ice cubes into water.
Observe what happens.
They float.
Ask:
“Ice is made from water, so why does it float on water?”
As water freezes, its structure expands, making ice less dense than liquid water.
You don’t need to explain the full molecular science to young children. Simply introduce the idea that the same material can behave differently when it changes form.
Watch what happens as the ice melts.
10. Guess, Test and Record
Create a simple science table.
| Object | My Prediction | What Happened |
|---|---|---|
| Leaf | Float | Float |
| Coin | Sink | Sink |
| Cork | Float | Float |
| Stone | Sink | Sink |
Children can draw pictures instead of writing words.
Before each test:
Predict.
Then:
Test.
Finally:
Record what happened.
This introduces children to a simple scientific investigation process.
Ask Prediction Questions
Before placing anything into the water, ask:
“What do you think will happen?”
Then encourage children to explain why.
They might say:
“I think the rock will sink because it feels heavy.”
After testing, ask:
“Was your prediction correct?”
A prediction does not need to be correct to be useful.
Science is about testing ideas and learning from what happens.
Compare Objects
Choose two objects and ask children to compare them.
Try:
Which one is heavier?
Which one is bigger?
Which one floats higher?
Which one went to the bottom faster?
This encourages children to use descriptive and comparative language.
Introduce the Idea of Density Simply
For young children, you can explain density without making it complicated.
You might say:
“Some things have more material packed into the same amount of space.”
Objects that are less dense than water tend to float, while objects that are more dense than water tend to sink.
The exact result also depends on the object’s shape and whether it contains trapped air.
Explore Buoyancy
Buoyancy is the upward force that water pushes against an object.
You can introduce the word naturally:
“The water is helping push the boat upward. That is called buoyancy.”
Children don’t need to memorise the term.
Hearing scientific vocabulary during a real experiment helps build understanding over time.
Make It a STEM Challenge
Instead of only testing objects, give children a problem to solve.
Try:
“Can you build something that floats?”
“Can your boat carry five coins?”
“Can you change something that sinks so it floats?”
This adds engineering and problem-solving to the science activity.
Skills Children Can Practise
Sink-or-float activities can support:
- Prediction
- Observation
- Early scientific thinking
- Problem-solving
- Comparing
- Counting
- Measuring
- Vocabulary
- Cause and effect
- Design thinking
- Concentration
- Curiosity
Keep Water Experiments Safe
Always supervise children around water.
Use shallow containers, keep the floor around the activity as dry as possible and empty tubs when the experiment is finished.
Use objects that are safe for the child’s age and avoid very small items with children who may put objects in their mouths.
Keep Learning With PlayPrintGrow
Sink-or-float experiments are simple, but they introduce children to big scientific ideas.
Let children predict, test objects, build boats and change their designs.
Each time the result surprises them, they have another reason to ask:
“Why did that happen?”
And that question is where science begins.
Predict. Test. Observe. Grow.